
|
|
|
|
| dbracing Home | EV Home | About Us | Search | Contact Us | FAQs | Products | EV INFO | become a dealer | |

Step 1. Take vehicle to a do it yourself car wash and wash the engine and transmission also the rear end do everything under the car really good. You will be working on the rear spring & shocks. Spray all bolts & nuts with penetrating oil make sure to spray the rear spring bolts & nuts real good do this for two or three days or longer it will help when you go to take them off.
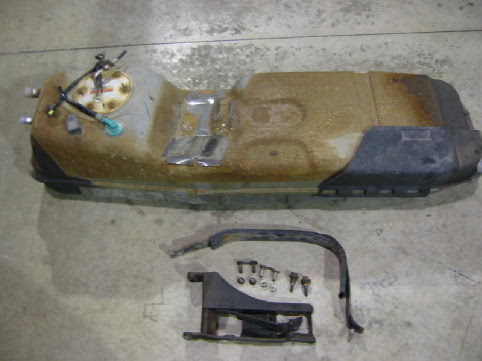
Step 2.It is best to start this project with as little gas in the tank as possible (Next disconnect battery) Remove strap from gas tank you will find a bracket on top of the tank that has to come off so put a jack under the tank to hold it up while you take off the bracket.
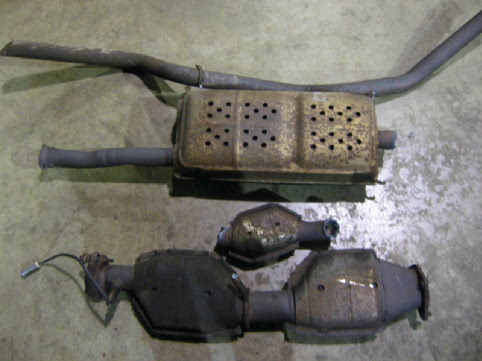
Step 3 Remove exhaust system.
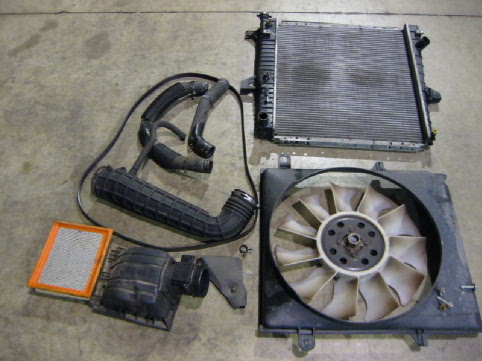
Step 4. Drain radiator and remove radiator
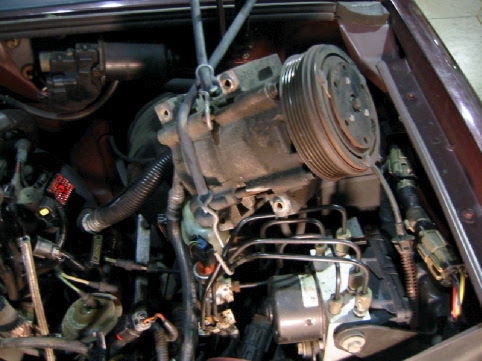
Step 5 remove AC pump & Power steering as an assembly do not disconnect AC or PS pressure lines you will be using the pump with an electric motor. Also you will be taking the idler pulley off of the engine and using it for the AC/PS set up. Note: tie the pumps over to the side out of the way of engine removing, Please label wires that come off the AC pump.

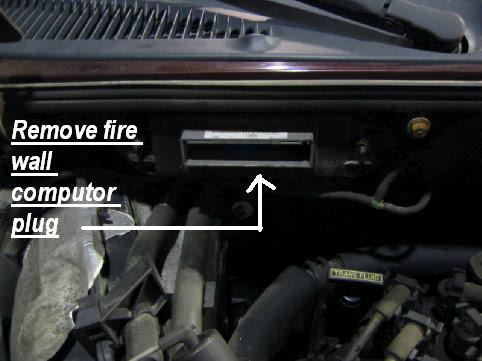
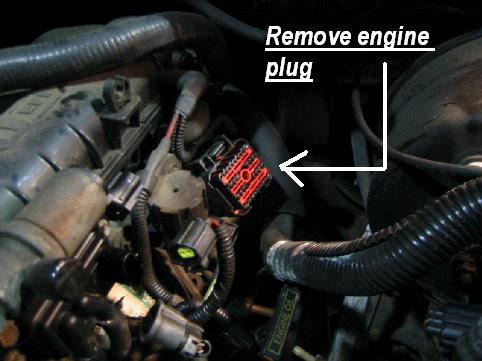
Step 6 Label all wires and take them off this is important to do this, as you will be using some of them like the heater/AC/ABS brakes (see pictures)
Step 7 unhooks the gas pedal (throttle) cable & the cruise control cable from the engine you will be using these.
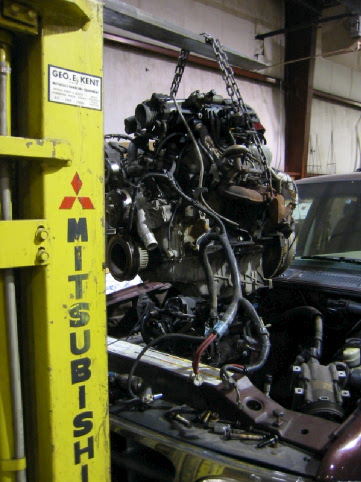
Step 8 Remove Transmission bolts & converter bolts, remove engine (Keep the motor mount nut's you will need them to mount the electric motor) Note: there is a bracket on the oil pan that holds the transmission lines make sure you take it off as the lines stay in the vehicle. After removing engine scrap off all grease & spray with brake clean & wipe clean. Next wire brush all rust off and paint with gloss black.Electric Vehicles can last 20 to 30 years if you keep after the rust now is the time with the engine out to do a good job removing any and painting the area.
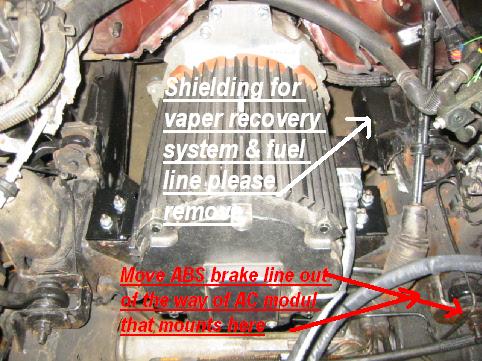
Step 9 After Removing the engine and cleaning & painting the area you will need to move the ABS brake line out of the way of the AC module and remove the shielding that covers the gas line and vapor recovery system. Take off the gas line and the vapor recovery lines all the way back to the fuel filter use a cutter or hacksaw to cut the lines. Do not use any electric cutting tools as the filter will have gas in it.
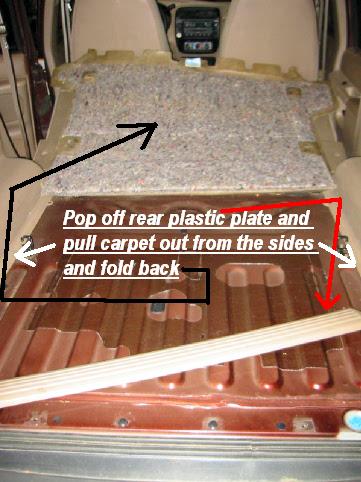
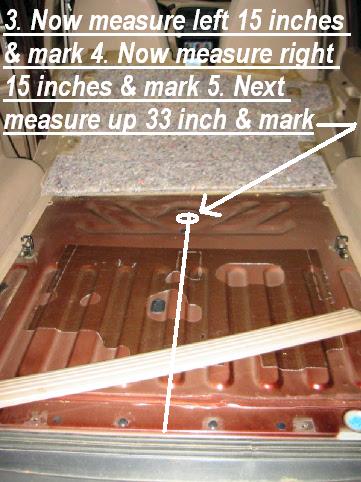
Step 10 Cutting out rear deck to make room for battery rack. Please Measure correctly if you are not sure then drill a hole in each conner and look up from under the vehicle (Please click on pictures for more info)
Step 17 Wiring. With the engine out you need to take off the starter wiring harness and remove the plastic covering and take out the heavy wire & the yellow going to the starter you no longer need these. Next rehook up the batteries positive cable and ground cable,tape up the wires for the AC unit and replug them into the wiring harness. (Please click on pictures for more info)
Step 19 Mounting the motor. With the motor mounted to the transmission you can lower it down onto the motor mounts. Keeping a stain on the motor with your lifter place the 4-1/2 inch bolts thru the motor mount plate & thru the mounting plate you received with your order. (Please click on pictures for more info)
Step 20 Power steering Module. Next you will mount the Power steering module in behind the AC radiator and the back of the electric motor (Please click on pictures for more info)
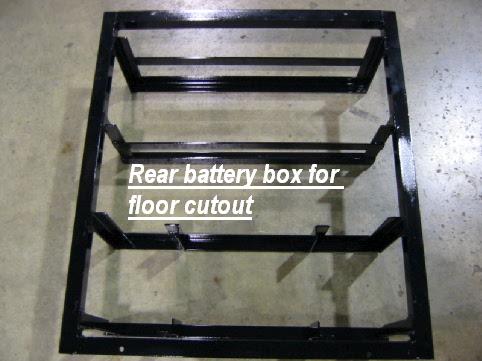
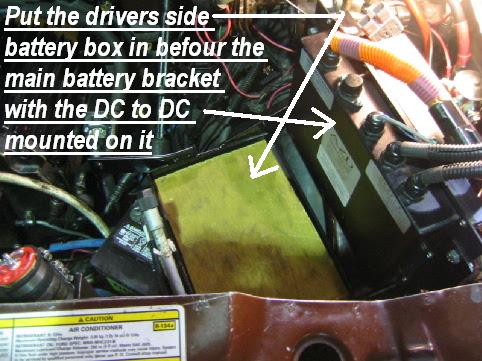
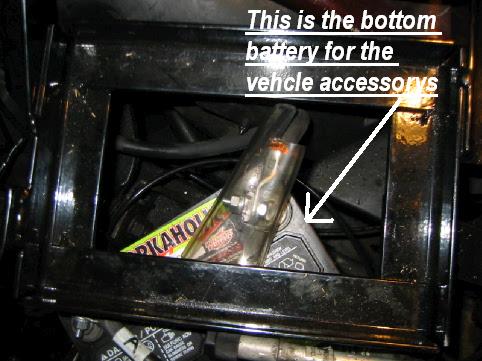
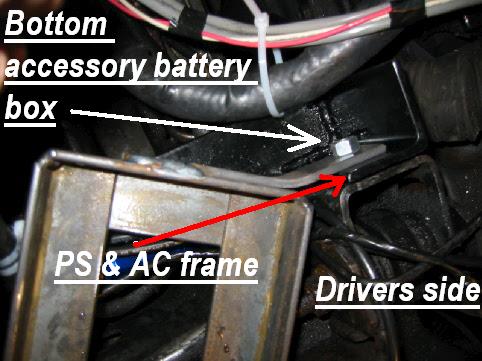
Step 21 Next you will mount the main batteries box and the two small batteries boxes on ether side of the main box. (Please click on pictures for more info)
 Step 11 Tape from hole to hole to get a good line to cut on use a saber saw with a long blade (Please click on pictures for more info)
Step 16 Next you will be installing the batteries. Note: batteries boxes are made to fit interstete group SRM-24 batteries size 11 inch long 6 3/4 inch wide & 9.5 inchs high. If you are going to use AGM type batteries you need to order them in the same size. (Please click on pictures for more info)
Step 11 Tape from hole to hole to get a good line to cut on use a saber saw with a long blade (Please click on pictures for more info)
Step 16 Next you will be installing the batteries. Note: batteries boxes are made to fit interstete group SRM-24 batteries size 11 inch long 6 3/4 inch wide & 9.5 inchs high. If you are going to use AGM type batteries you need to order them in the same size. (Please click on pictures for more info)
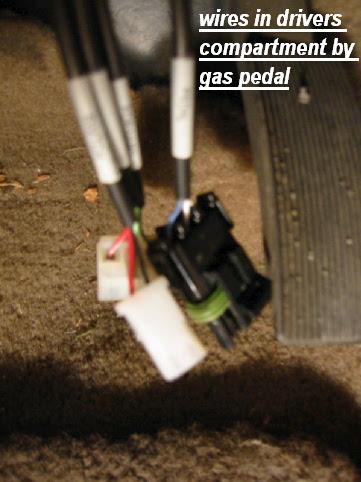
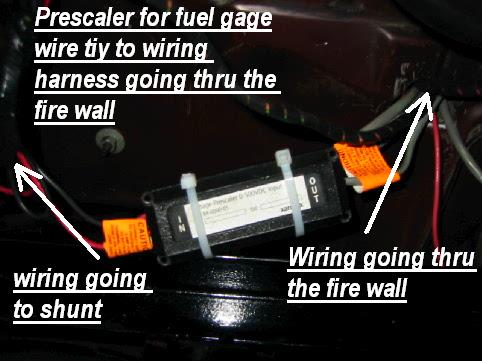
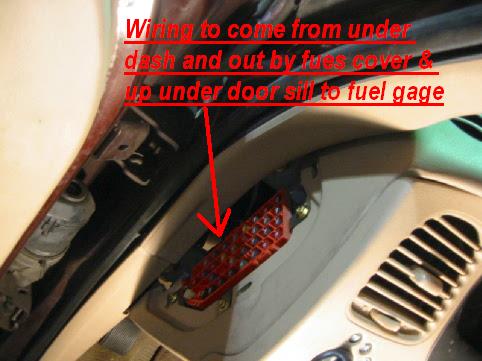
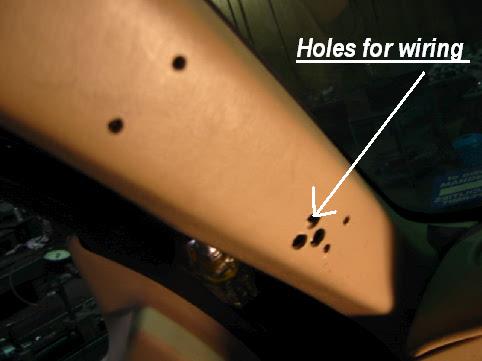
Step 22 Running the Pedal control and gage wiring harness. Drill a hole with a 2 inch hole saw to the right of the gas pedal this is for the pedal & gage wiring harness. The main wiring harness coming off the DMOC controller (this is the controller that has the batteries wires going to it) After hooking the wiring harness up to the controller (make sure the wire is out of the way of the drive belt for the AC-PS unit, you need to wire tie the wire to make sure it can not come into contact with the AC-PS belt) then run it under the batteries box frame and and up the fire wall to the pre cut hole you made & put the wires through & inside the drivers compartment. (Please click on pictures for more info)


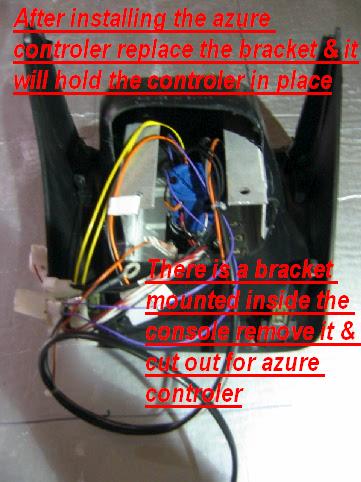
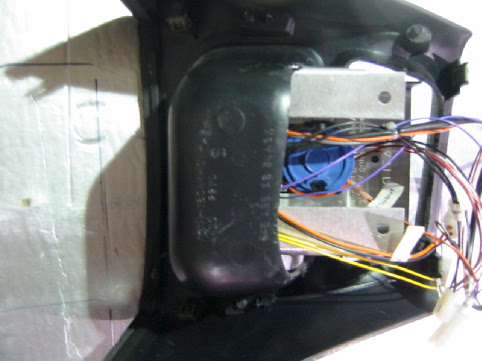
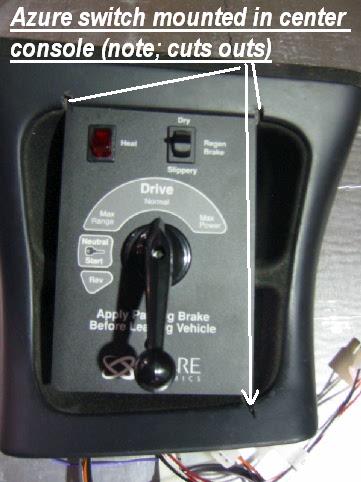
Step 23 Mounting the azure control box. Pop off the center console top then turn it over and remove 4 screw that hold the felt liner in place and cut out the size of the azure controller then place the controller in the plastic outer frame. Then put the inner piece that you cut out over the back of the controller and screws in in place. next feed your wiring thru and out the back side next to the drivers compartment and plug the wires into the wiring harness. (Please click on pictures for more info)

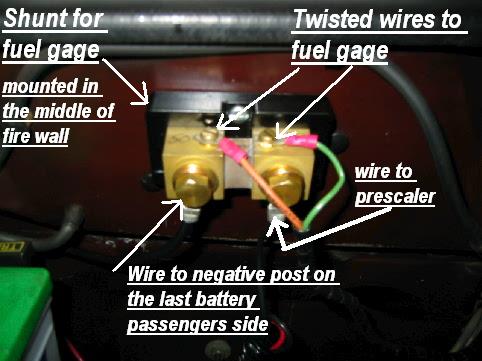
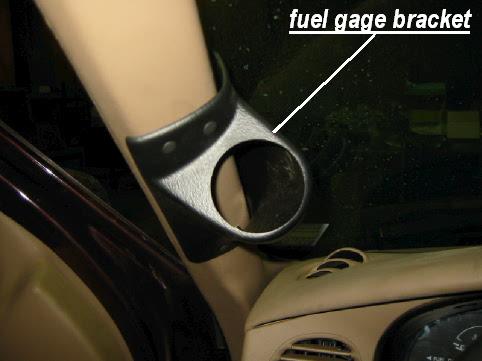
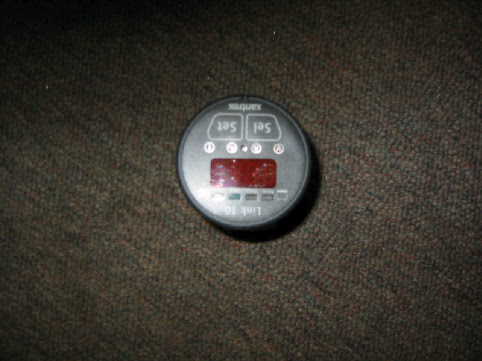
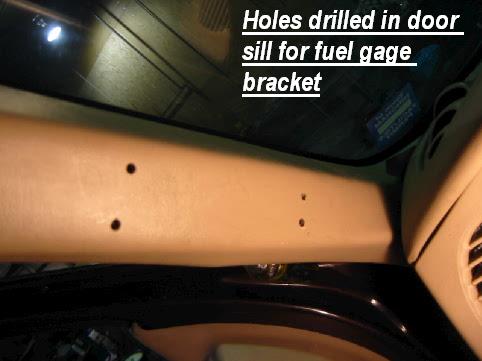
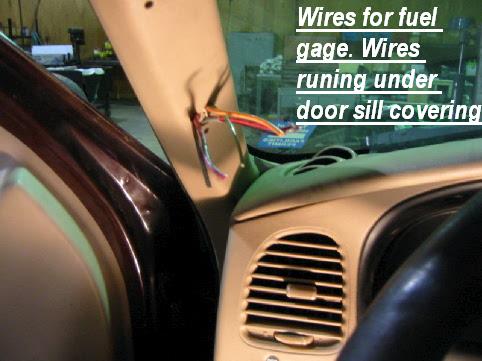
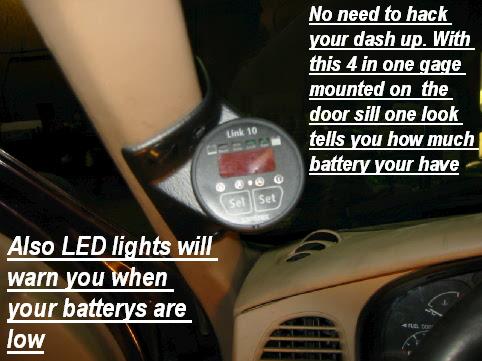
Step 24 Installing the fuel gage. Mount Fuel gage bracket to door frame (Please click on pictures for more info)
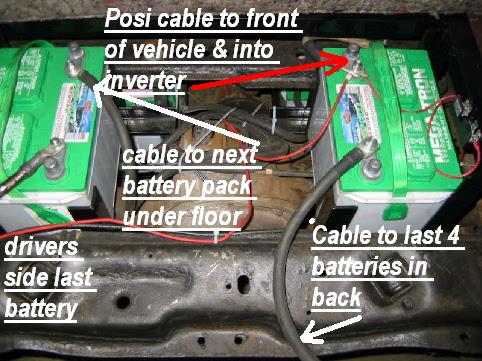
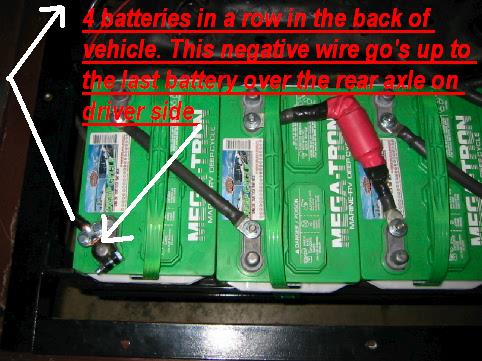
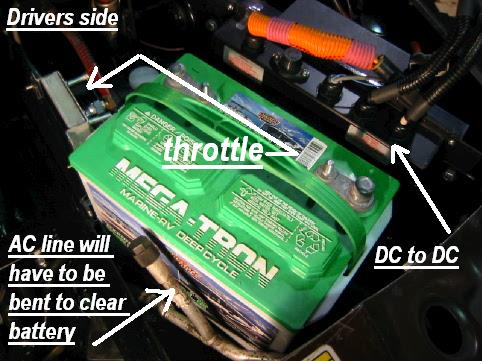
Step 25 Installing the Battery Packs. Do not put two batteries side by side with the posi & negative post next to each other (Please click on pictures for more info)
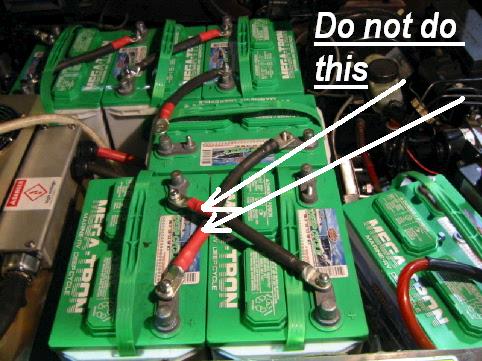
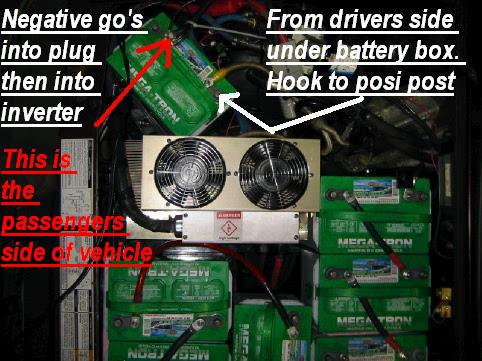


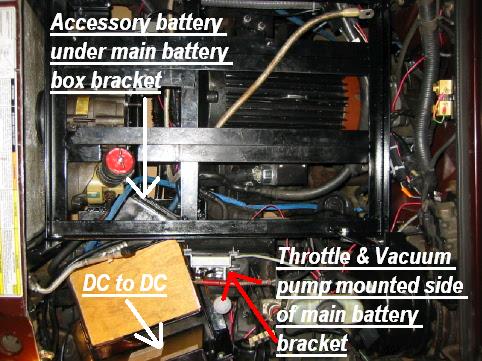
Step 26 Installing the engine compartment Battery Pack. Do not put two batteries side by side with the posi & negative post next to each other (Please click on pictures for more info)


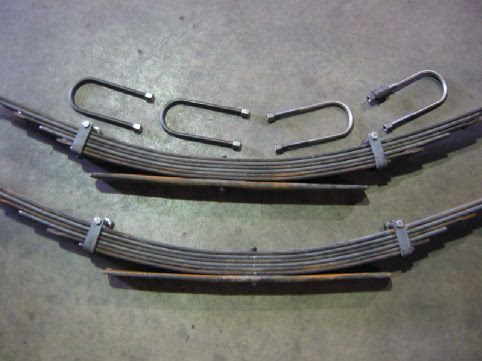
Step 27 Installing springs. You will need to add one or two leafs to your springs (Please click on pictures for more info)
|
|
|
888 558 5757 ©2000 |